|
|
|
|
|
# vue-webtopo-svgeditor
|
|
|
|
|
|
|
|
|
|
|
|
> 基于vue3实现的svg可视化web组态编辑器。可无需修改代码动态添加组件
|
|
|
|
|
|
|
|
|
|
|
|
当前主分支版本为2.1
|
|
|
|
|
|
|
|
|
|
|
|
## [版本1.0请点此](https://svgv1.yaolunmao.top)
|
|
|
|
|
|
|
|
|
|
|
|
## [图片挂了点此](https://www.cnblogs.com/Hero-/p/14784744.html)
|
|
|
|
|
|
|
|
|
|
|
|
## 预览地址
|
|
|
|
|
|
|
|
|
|
|
|
[https://svg.yaolunmao.top](https://svg.yaolunmao.top)
|
|
|
|
|
|
|
|
|
|
|
|
## 如何使用
|
|
|
|
|
|
|
|
|
|
|
|
```
|
|
|
|
|
|
# 克隆项目
|
|
|
|
|
|
git clone https://github.com/yaolunmao/vue-webtopo-svgeditor.git
|
|
|
|
|
|
|
|
|
|
|
|
# 进入项目目录
|
|
|
|
|
|
cd vue-webtopo-svgeditor
|
|
|
|
|
|
|
|
|
|
|
|
# 安装依赖
|
|
|
|
|
|
yarn install
|
|
|
|
|
|
|
|
|
|
|
|
# 启动服务
|
|
|
|
|
|
yarn serve
|
|
|
|
|
|
|
|
|
|
|
|
```
|
|
|
|
|
|
|
|
|
|
|
|
## 操作
|
|
|
|
|
|
|
|
|
|
|
|
点击载入模板 进入预览页点击模拟硬件 等待两秒钟即可看到动态效果
|
|
|
|
|
|
|
|
|
|
|
|
- 鼠标左键选中组件 按住可拖动至画布
|
|
|
|
|
|
- 鼠标双击画布取消选中组件
|
|
|
|
|
|
- 右侧工具栏调整选中组件样式
|
|
|
|
|
|
- 键盘↑↓←→可移动选中组件
|
|
|
|
|
|
- ctrl+c复制当前选中组件
|
|
|
|
|
|
- deleted删除当前选中组件
|
|
|
|
|
|
- 鼠标滚轮放大缩小选中组件
|
|
|
|
|
|
|
|
|
|
|
|
## 动态添加组件
|
|
|
|
|
|
|
|
|
|
|
|
可使用任意生成svg代码的工具,我这里使用在线编译器进行模拟
|
|
|
|
|
|
|
|
|
|
|
|
点击[这里](https://svgedit.yaolunmao.top/)进行svg图像绘制,我这里以心形为例
|
|
|
|
|
|
|
|
|
|
|
|

|
|
|
|
|
|
|
|
|
|
|
|
将svg代码复制下来,双引号进行转义,删除无用属性(比如id),你也可以直接使用我下面的代码
|
|
|
|
|
|
|
|
|
|
|
|
```
|
|
|
|
|
|
<path fill=\"#FF0000\" stroke=\"#000000\" stroke-width=\"5\" style=\"pointer-events:inherit\" d=\"m143.72081869586242,163.35565803158485 c14.617751633754164,-41.93617271978648 71.89058180534832,0 0,53.91793635401125 c-71.89058180534832,-53.91793635401125 -14.617751633754164,-95.85410907379776 0,-53.91793635401125 z\" fill-opacity=\"1\" stroke-opacity=\"1\"></path>
|
|
|
|
|
|
```
|
|
|
|
|
|
|
|
|
|
|
|
将拓展字段进行双向绑定 我目前只做了颜色
|
|
|
|
|
|
|
|
|
|
|
|
```
|
|
|
|
|
|
<path :fill=\"prop_data.svgColor\" :stroke=\"prop_data.svgColor\" stroke-width=\"5\" style=\"pointer-events:inherit\" d=\"m143.72081869586242,163.35565803158485 c14.617751633754164,-41.93617271978648 71.89058180534832,0 0,53.91793635401125 c-71.89058180534832,-53.91793635401125 -14.617751633754164,-95.85410907379776 0,-53.91793635401125 z\" fill-opacity=\"1\" stroke-opacity=\"1\" transform=\"translate(-145,-180)\"></path>
|
|
|
|
|
|
```
|
|
|
|
|
|
|
|
|
|
|
|
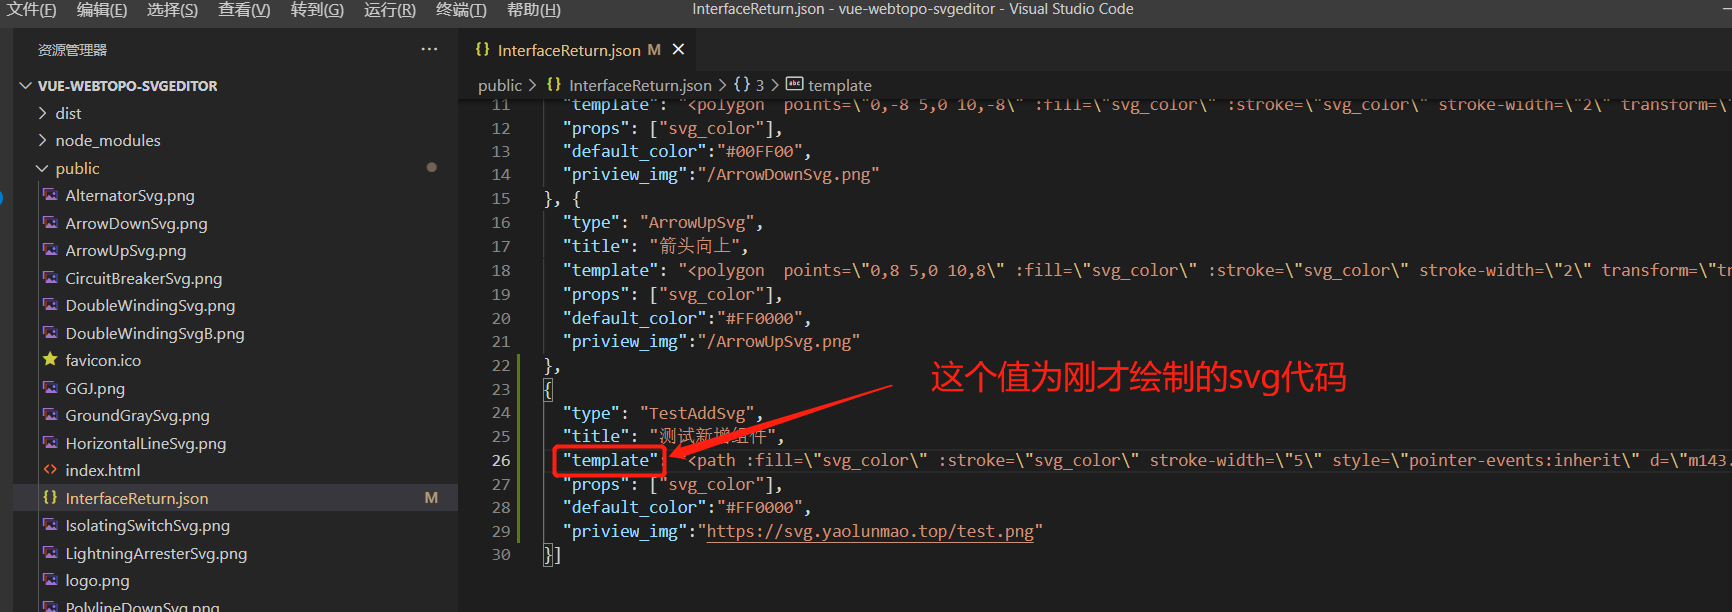
修改项目文件夹pubilc下的模拟接口返回的json,新增一项:
|
|
|
|
|
|
|
|
|
|
|
|
```
|
|
|
|
|
|
{
|
|
|
|
|
|
"type": "TestAddSvg",
|
|
|
|
|
|
"title": "测试新增组件",
|
|
|
|
|
|
"panel_class": "draggable",
|
|
|
|
|
|
"template": "<path :fill=\"prop_data.svgColor\" :stroke=\"prop_data.svgColor\" stroke-width=\"5\" style=\"pointer-events:inherit\" d=\"m143.72081869586242,163.35565803158485 c14.617751633754164,-41.93617271978648 71.89058180534832,0 0,53.91793635401125 c-71.89058180534832,-53.91793635401125 -14.617751633754164,-95.85410907379776 0,-53.91793635401125 z\" fill-opacity=\"1\" stroke-opacity=\"1\" transform=\"translate(-145,-180)\"></path>",
|
|
|
|
|
|
"props": ["prop_data"],
|
|
|
|
|
|
"default_attr": {
|
|
|
|
|
|
"color": "#FF0000"
|
|
|
|
|
|
},
|
|
|
|
|
|
"create_type": "draggable",
|
|
|
|
|
|
"priview_img": "https://svg.yaolunmao.top/test.png"
|
|
|
|
|
|
}
|
|
|
|
|
|
```
|
|
|
|
|
|
|
|
|
|
|
|
|
|
|
|
|
|
|
|
|
|
|
|
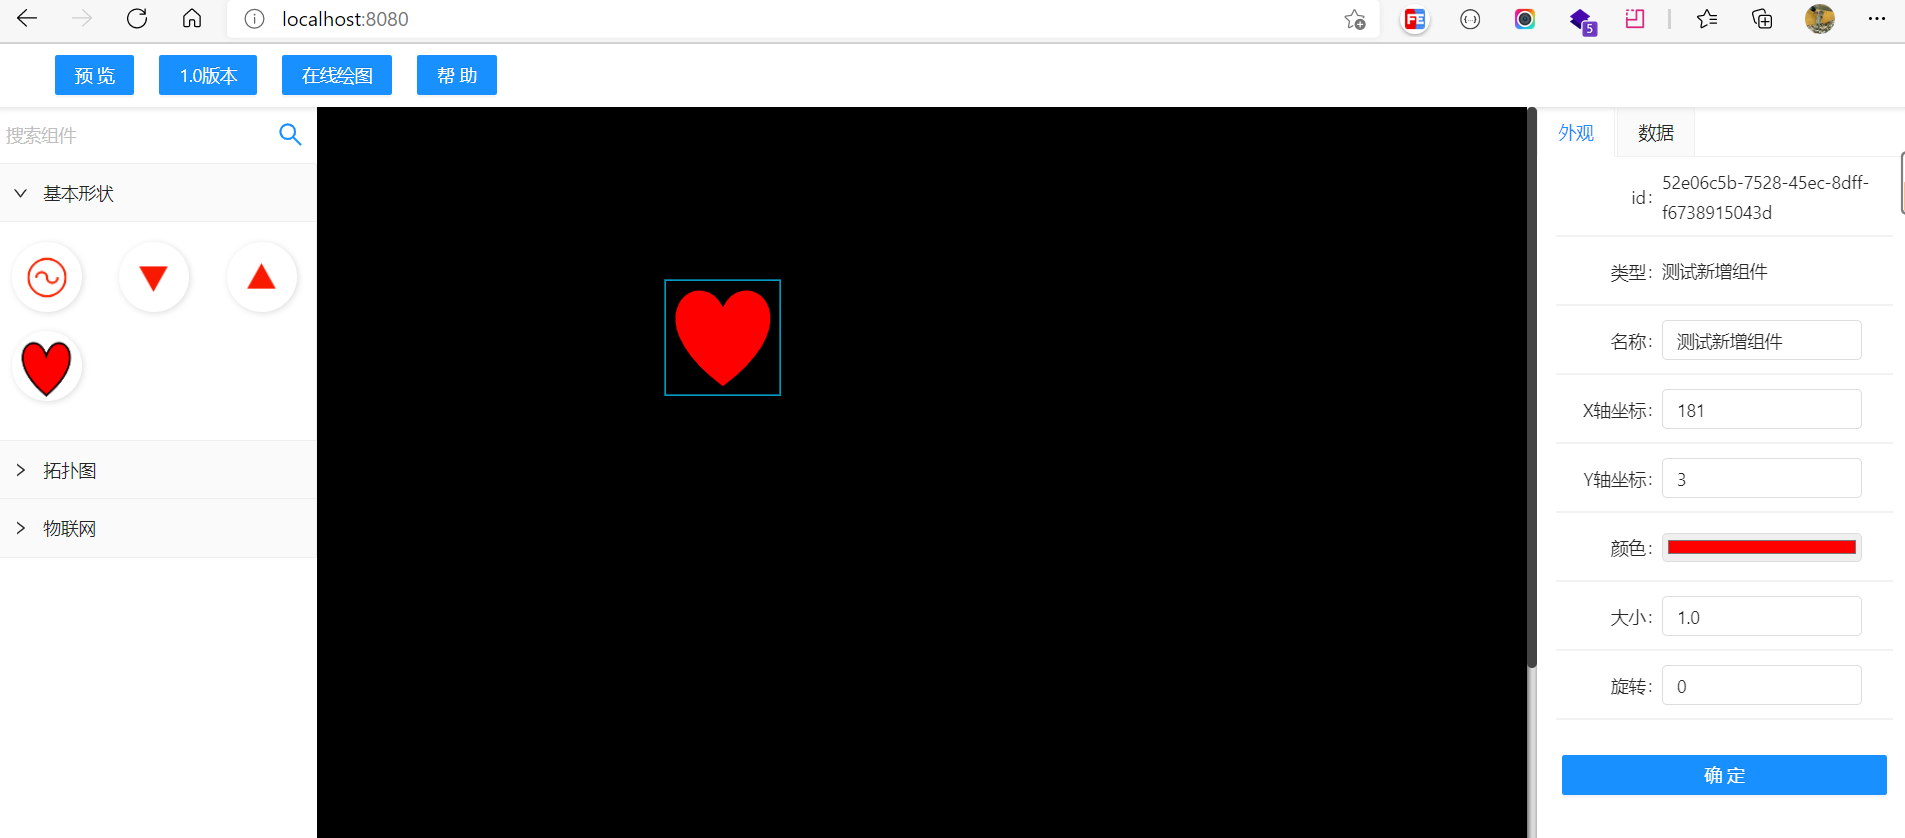
启动项目,就可以看到刚才添加的组件了
|
|
|
|
|
|
|
|
|
|
|
|
|
|
|
|
|
|
|
|
|
|
|
|
也支持直接引入图片,只不过放大有失真,将下面的代码替换上面json文件的template值
|
|
|
|
|
|
|
|
|
|
|
|
```
|
|
|
|
|
|
<image x=\"-33\" y=\"-33\" width=\"66\" height=\"66\" xlink:href=\"https://svg.yaolunmao.top/test.png\" />
|
|
|
|
|
|
```
|
|
|
|
|
|
|
|
|
|
|
|
ps:目前中心辅助线的坐标取决于svg组件的中心坐标,请自行添加transform属性调整svg组件中心坐标
|
|
|
|
|
|
|
|
|
|
|
|
## 截图
|
|
|
|
|
|
|
|
|
|
|
|
|
|
|
|
|
|
|
|
|
|
|
|
## 
|
|
|
|
|
|
|
|
|
|
|
|

|
|
|
|
|
|
|
|
|
|
|
|

|
|
|
|
|
|
|
|
|
|
|
|
|
|
|
|
|
|
|
|
|
|
|
|
## License
|
|
|
|
|
|
|
|
|
|
|
|
[MIT](http://opensource.org/licenses/MIT)
|